Getting Started with Systweak eSign
Welcome to Systweak eSign! This guide covers the essentials of setting up your account, navigating the interface, and preparing for your first signature workflow. Let's get you up and running quickly.
1. Account Setup & Profile
When you first log into Systweak eSign, take a minute to review your personal user information. This information is used in several templates, so it’s important to ensure it is correct.
- Click on arrow near your name in the upper-right corner to open the menu, and click Profile or Navigate to Settings > Edit Profile
The profile page shows the specific values that Systweak eSign will use when personalizing any of your transactions. Of particular interest are:
- Your email address – This is your login ID and where all system notifications will be sent
- Your full name – Used in email communications and for your default typeset signature
- Your job title – Automatically populates if you ever have a Title field to fill in
- Your contact number – This is used for any necessary account verification
Here you can adjust any of the content, and then Save your edits.
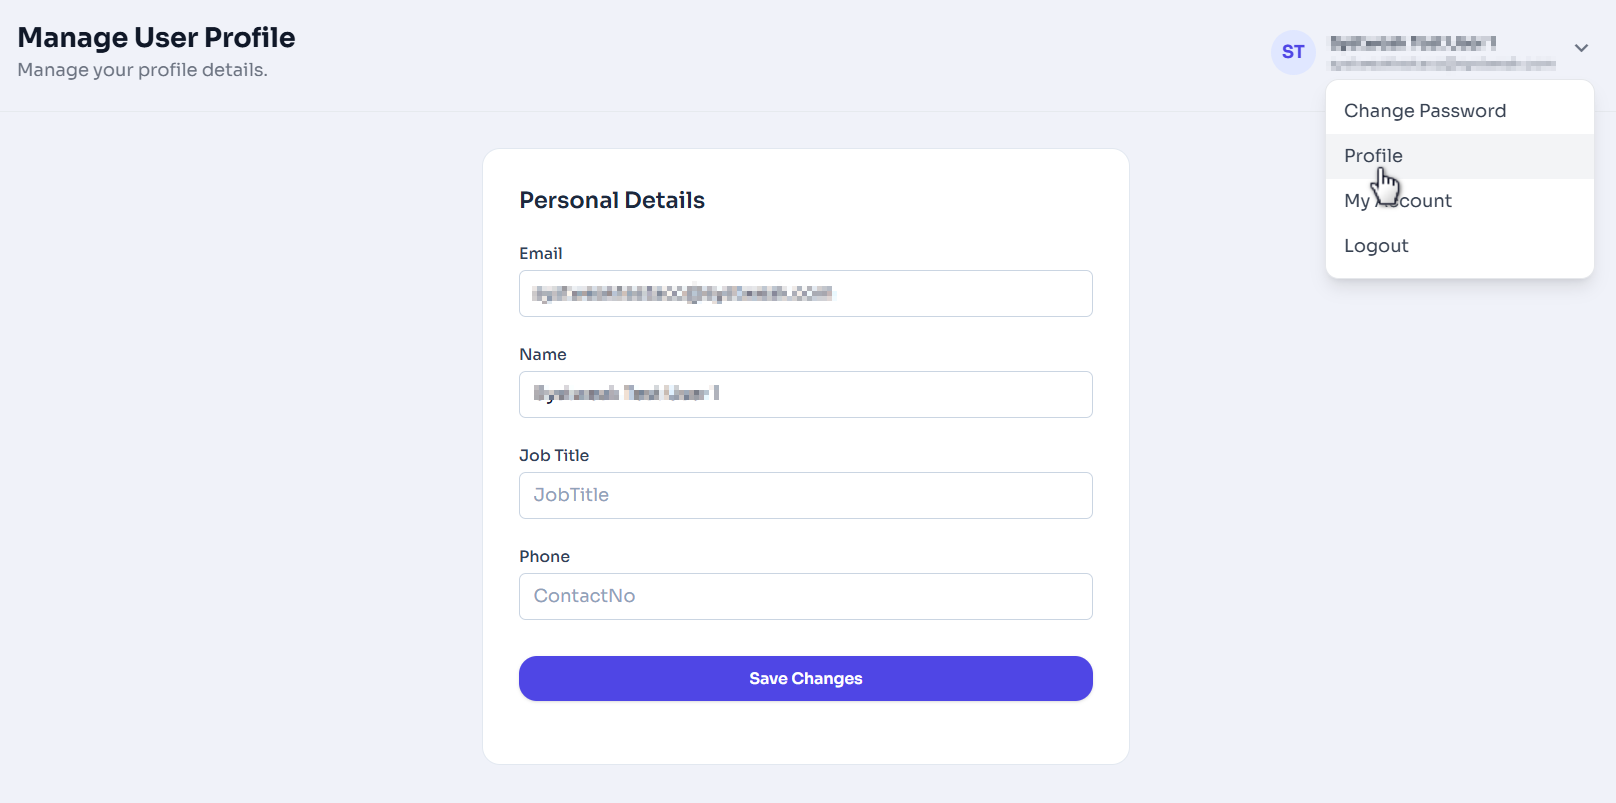
Figure 1: Configure your personal details.
2. Dashboard Tour
The Home page is a view composed of the following sections that give you a quick view and access to most of the Systweak eSign features:
- Document Upload Area: – You can drag and drop or browse a PDF document here to start the signing process quickly.
- Recent Documents: – A list of your recently modified documents.
- Document Status Graph: – A visual representation of the status of your documents.
-
More things you can do: – A list of other common actions
- Sign Yourself: – Sign documents on your behalf without needing to forward them.
- Manage Users: – Create or Manage user.
- Manage Account: – Manage your account settings and preferences.
- View Analytics: – View insights and analytics related to your documents.
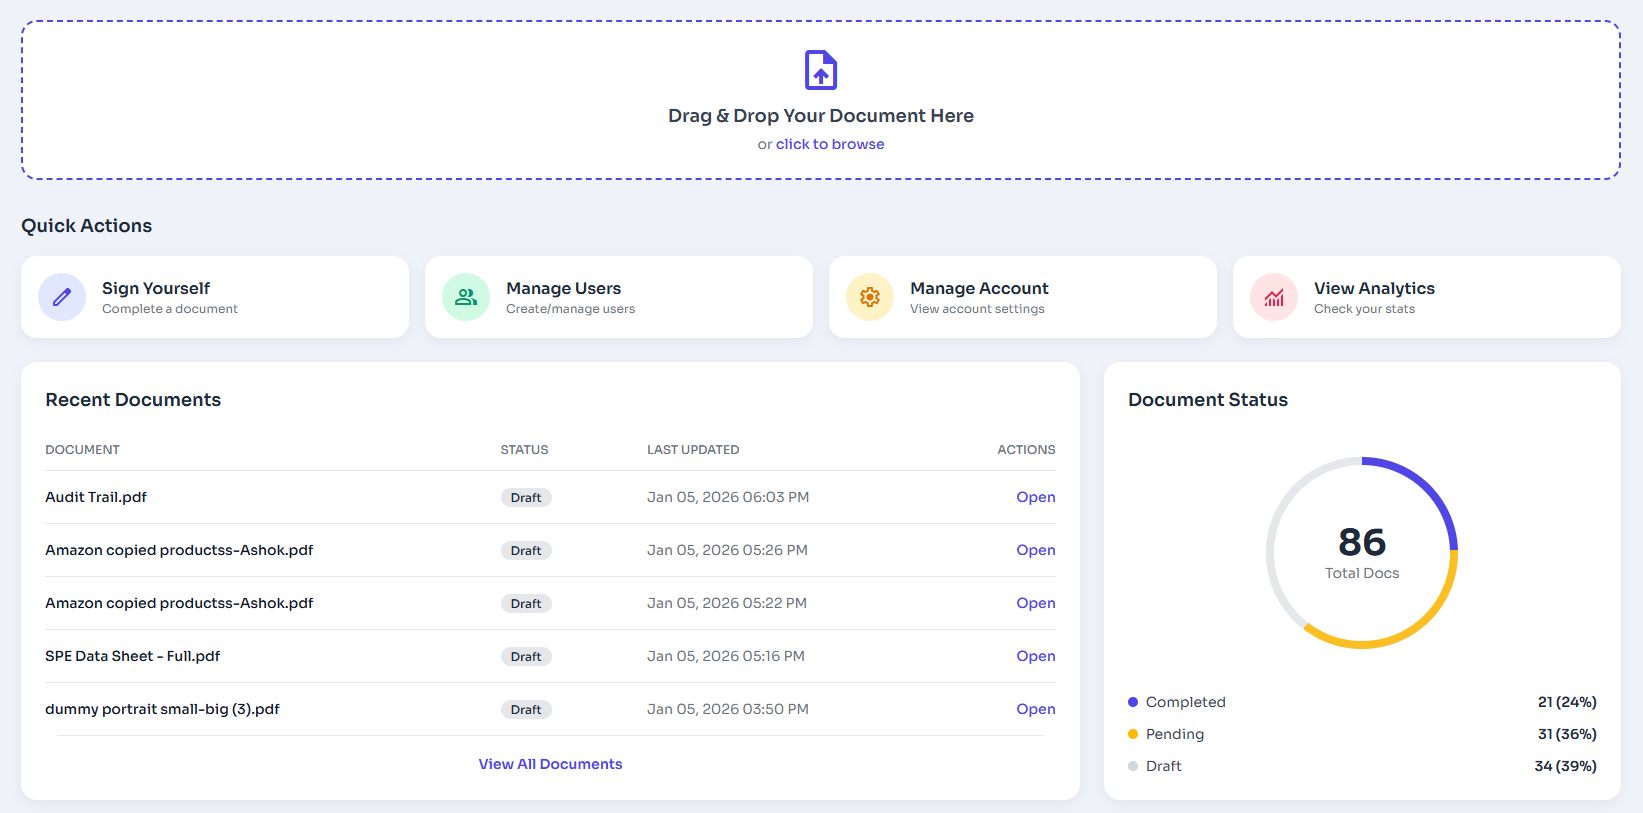
Figure 2: Dashboard Tour Overview.
Security Tip: Two-Factor Authentication
We strongly recommend enabling 2FA in the Security tab to add an extra layer of protection to your account and documents.
3. Sending Your First Document
Ready to send a document? Click the prominent "Send For Signature" button. You'll be guided through four simple steps: upload your file, add signer email addresses, drag fields onto the document, and preview before sending.
Next Steps
Now that you are set up, explore our advanced features to streamline your workflow:
list_alt On This Page
Related Articles
Need more help?
If you can't find what you're looking for, our support team is here to assist you.
Contact Support