How to send a Document for eSign
Learn the quick steps to upload and dispatch your first document. Sending a document for signature is the core function of Systweak eSign. This guide will walk you through the process from start to finish.
Step 1: Uploading your document
To begin, navigate to the Dashboard and click the prominent "Send for Signature" button in the top right corner. You can upload files in only PDF format.
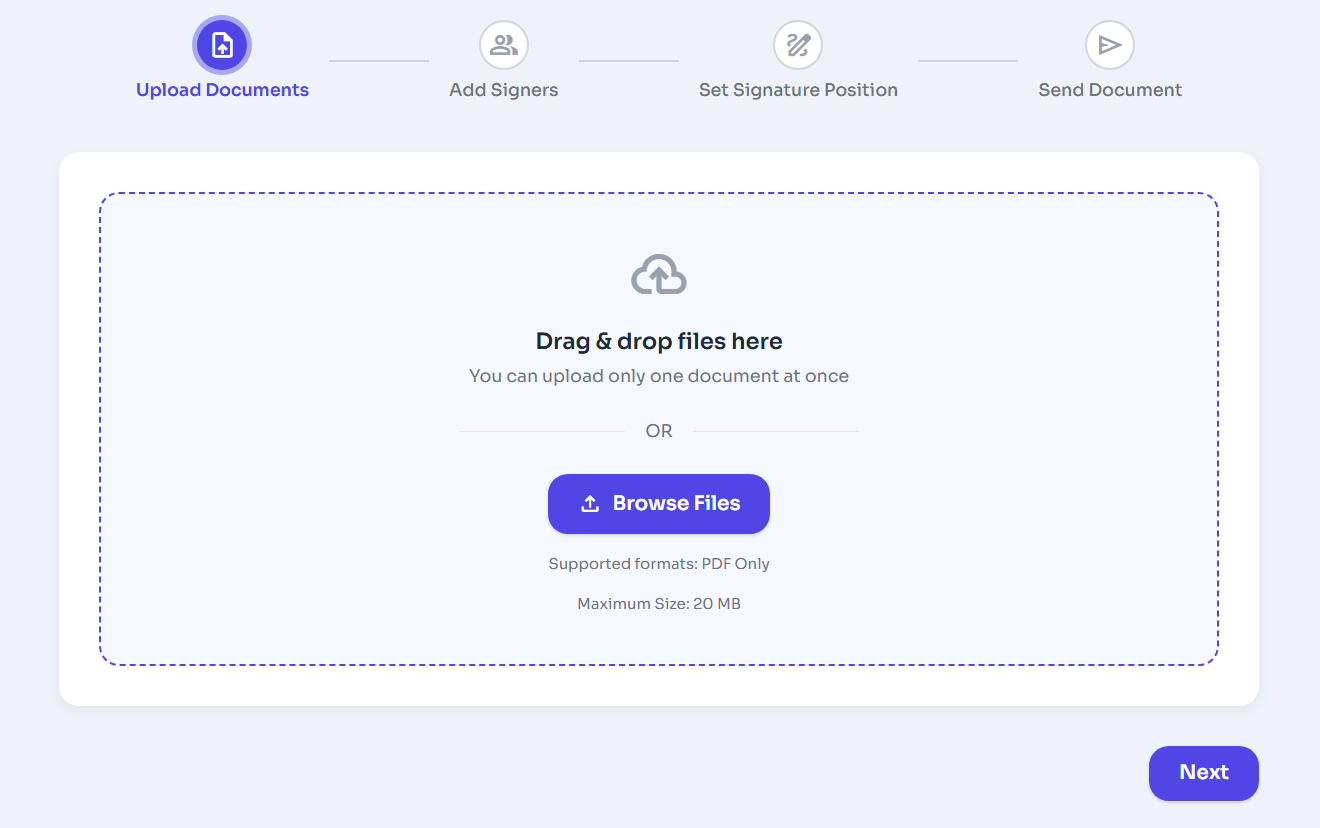
Figure 1: Document Upload Area.
-
Upload the Document
- Drag and drop your PDF file into the upload area, or click Browse Files to select a file from your device.
- Only one document can be uploaded at a time.
- Supported file format is PDF.
-
Proceed to the Next Step
- After the document is successfully uploaded, click Next.
- You will be redirected to the Add Signers step.
Step 2: Adding Signers
Once your document is uploaded, you'll need to specify who needs to sign it. In the "Signers" section:
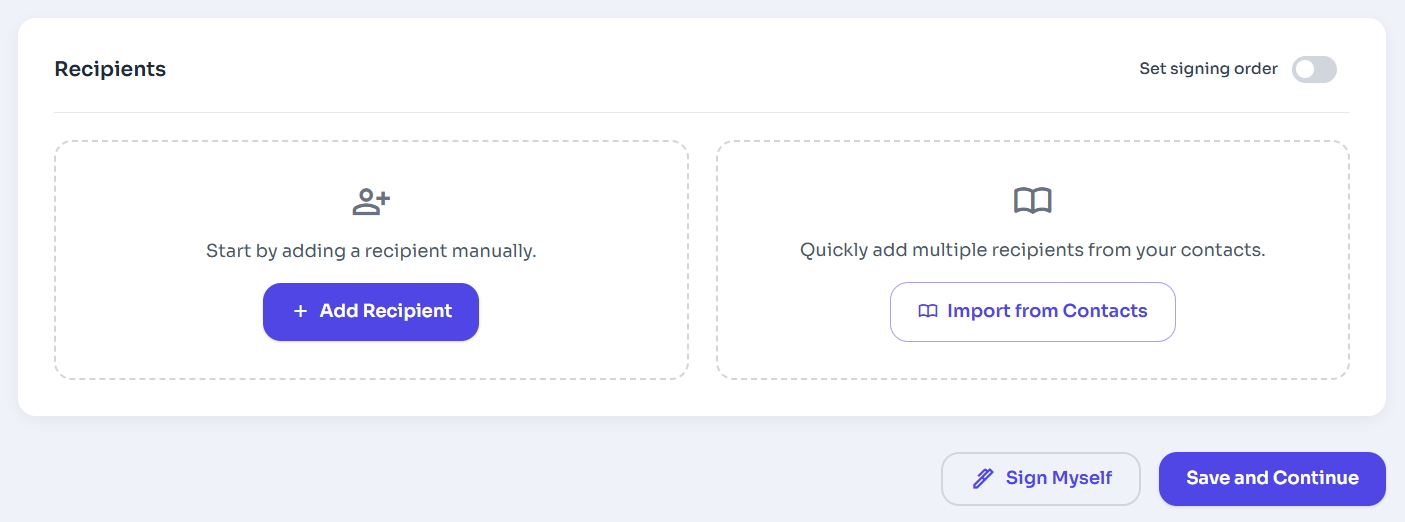
Figure 2: Add Signers
-
Add Signers Manually
- Click Add Signer to manually add a signers.
- Enter the signer’s details such as name and email address.
-
Import Signers from Contacts
- Click Import from Contacts to quickly add multiple signers.
- Select the required contacts from your saved contact list.
-
Set Signing Order (Optional)
- Enable the Set signing order toggle if signers must sign in a specific sequence.
- Define the order in which each signer will receive the document.
-
Sign the Document Yourself (Optional)
- Click Sign Myself if you want to add yourself as a signer.
-
Save and Continue
- After adding all signers, click Save and Continue.
- You will proceed to set signature positions.
Pro Tip: Signing Order
Check the "Set signing order" box if you need signers to sign in a specific sequence (e.g., Employee first, then Manager).
Step 3: Placing Fields
Drag and drop fields from the right sidebar onto your document.
-
Select Signer
- Use the Select Signer dropdown to choose the signer for whom you want to add fields.
- Ensure the correct signer is selected before placing any fields.
-
Add Recommended Fields
- Drag and drop the Signature, Name, or Date Signed fields onto the document.
- These fields are commonly required for signing and identification.
-
Add Additional Field Types
- Drag and drop fields such as Email, Company, Text, or Number as needed.
- Use these fields to collect extra information from the signer.
-
Place Fields on the Document
- Drag the selected field from the panel and drop it at the desired location on the document.
- Resize or reposition fields if required.
-
Proceed to Review
- Click Next: Review once all required fields are added.
- You will be redirected to the document review screen.
Commonly used fields include:
Signature
The primary signature field.
Date Signed
Auto-populates when signed.
Text Box
For names, addresses, etc.
Numbers
For number fields.
Step 4: Preview and Send
Before sending, you can preview the document to ensure all fields are correctly placed.
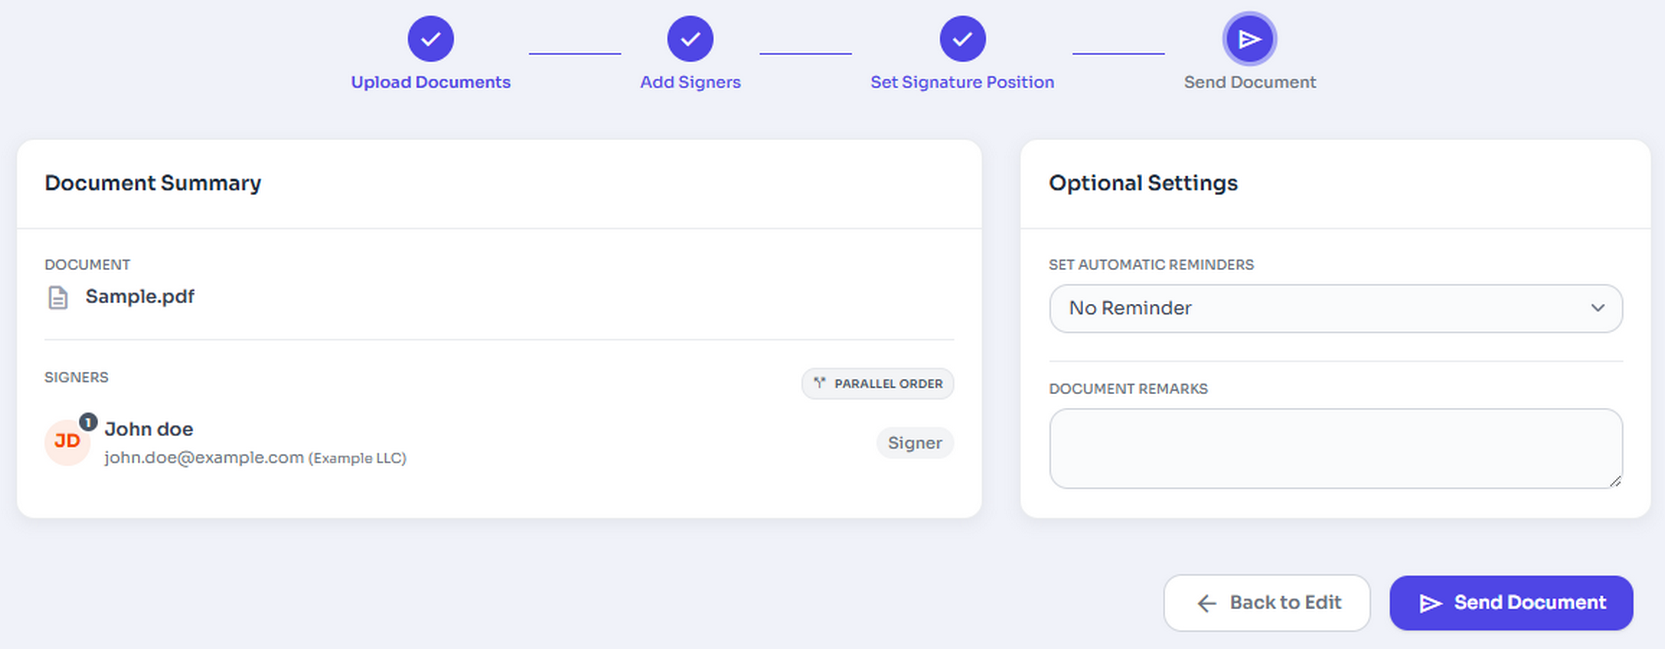
Figure 3: Preview and Send
Optional Settings – How to Configure Follow these steps to configure the Optional Settings while sending a document:
-
Set Automatic Reminders
- Click the Set Automatic Reminders dropdown.
- Choose No Reminder or select an available reminder option based on how often signers should be notified.
-
Select Effective Date
- Click the Effective Date field.
- Choose the date from the calendar or enter it manually in dd-mm-yyyy format.
- This date defines when the document becomes effective.
-
Select Expiry Date
- Click the Expiry Date field.
- Choose the date from the calendar or enter it manually in dd-mm-yyyy format.
- After this date, the document can no longer be signed.
-
Add Document Remarks (Optional)
- Enter any additional notes or instructions in the Document Remarks text box.
- These remarks are shared with signers for reference.
Once all required settings are configured, continue to the next step to send the document.
Note: All fields in Optional Settings are optional and can be left blank if not required.
Once you're satisfied, click the "Proceed" button to deliver the document.
list_alt On This Page
Related Articles
Need more help?
If you can't find what you're looking for, our support team is here to assist you.
Contact Support